
WWFB: Holiday Time = Disaster Time Edition
The scene: Your kitchen, Fakesgiving eve. This year, you’re assigned to bring a dessert to your in-laws’ Fakesgiving dinner, which is held annually on the weekend before Thanksgiving. They probably discovered your Heirloom Floor Carrots recipe from last year and are hoping you’ll have better luck with the sweet than you did with the savory.
They would be wrong.
It all started out with so much promise. You’d found a recipe for pumpkin cheesecake with a gingersnap crust and a salted caramel glaze. You did your shopping early in the week. You woke up early the day before Fakesgiving to start baking because you know cheesecake needs some time to chill and become its best self before being thrust into the spotlight at a party. You and cheesecake have a lot in common. #cheesecakeselfcare
They say the best-laid plans often go awry, and, spoiler alert: yours do, too. Spectacularly!
It wouldn’t be the holidays without a little culinary cataclysm, so pull up your tub of popcorn, settle into your comfiest chair, and read on to learn the harrowing tale of Fakesgiving cheesecake gone so, so awry.
PUMPKIN CHEESECAKE WITH GINGERSNAP CRUST
A recipe by World’s Worst Food Blogger, adapted from that one Redditor’s cheesecake recipe and the recipe from Sally the Addict* for homemade pumpkin spice.
*Ahem, Baking Addict
INGREDIENTS
Pumpkin Pie Spice
- 3 Tablespoons ground cinnamon
- 2 teaspoons ground ginger
- 1 and 1/2 teaspoons ground nutmeg
- 1 teaspoon ground cloves
- 1 teaspoon ground allspice
- 1/8 teaspoon ground black pepper
The Crust
- 1 package (14 oz) ginger snap cookies, to yield 2 cups of crumbs
I like Stauffer’s Snaps — a Cookie with “Zing”! - 6 tbsp (3/4) stick melted, unsalted butter
- 1/4 cup granulated sugar
- 1 tsp pumpkin pie spice
The Filling
- 32 oz cream cheese, room temperature
- 1 cup granulated sugar
- 1/4 cup packed light brown sugar
- 15 oz can pumpkin purée
- 4 large egg yolks
- 1/2 cup sour cream
- 1 tbsp pumpkin pie spice
- 1/4 tsp salt
- 1 tbsp vanilla extract
Caramel Sauce*
*Spoiler alert: If you follow my instructions to the letter, you will not need to make this.
- 1 cup granulated sugar
- 6 tbsp salted butter, room temperature cut up into 6 pieces
- 1/2 cup heavy cream at room temperature
- 1 tsp salt
Whipped Cream*
*Spoiler alert: You also will not need to make this.
- 1 cup heavy cream
- 1/4 cup powdered sugar
- 1 tsp pumpkin spice extract (ugh just use vanilla, you don’t need to buy a whole bottle of this shit that you’ll deplete 1 tsp at a time over the next 12 years #oldpumpkinspice)
Desperate Salvage-Attempt Cookies
- 2 packages (5.25 oz) Anna’s Ginger Thins
PREPARATION
STEP 1: Make the pumpkin spice mix
Toss all the ingredients into a mason jar.
I hope I don’t need to specify that you now need to put the lid on the mason jar. Then again, “disaster” is in the name of this recipe, so, for the record: Put the lid on the mason jar. Close it tight. Shake to combine.
If the ginger has lumps, get in there with a spoon and break them up. Nobody likes lumpy ginger. Close the lid and shake it again. Now you’re ready!
STEP 2: Prep your springform pan
The recipe calls for a 9-inch springform pan, but a 10-inch springform is also fine. Dimensions won’t matter in the end. (That, my friends, is called foreshadowing.)
Wrap the outside of the pan in 3 layers of foil. Consult the internet for wrapping techniques to keep out the water from the water bath. The internet is full of experts who definitely will not lead you astray. (And that, gentle reader, is called sarcasm.)
Step 3: Make the crust
Pulse most of the bag of ginger snaps (the Stauffer’s Snaps, not Anna’s Ginger Thins) in a food processor until fine crumbs form.
In a medium bowl, stir together the crumbs and melted butter along with the sugar and pumpkin pie spice.
Transfer into a 9-inch springform pan with 3″ tall walls and use a large spoon to press crumbs into the bottom of your springform pan, and going about 1/2″ up the sides of the pan.
Bake at 350°F for 8 minutes. Remove from oven and cool to room temp.
Gaze upon it lovingly. Inhale its zesty aroma. Imagine all the good times you’re going to have eating this crust when it is filled with your beautiful pumpkin cheesecake. Commit these sensations and images to memory because NONE OF THAT IS EVER GOING TO HAPPEN.
STEP 3.5: Go to the farmers’ market
You don’t need anything for this recipe, but it’s the last market of the season and you need to stock up on cheese for the winter because you live in Wisconsin and that’s just how it is. Besides, you’re meeting friends. And that crust needs to cool.
STEP 4: Make the cheesecake filling
Preheat oven to 350°F again if it’s not still on from making the crust. If it is still on, your local fire marshal might have a few things to say to you about leaving the house with the oven on.
In the bowl of your paddle mixer (or using a hand mixer, you don’t need to be fancy to make this cheesecake), beat the softened cream cheese and both sugars on medium speed until light and fluffy and without lumps, about 5 minutes. Scrape down the bowl as needed to make sure you don’t have chunks of cream cheese. Chunks of cream cheese would be a DISASTER!
In a separate bowl, using a whisk or hand mixer, stir together the pumpkin purée, egg yolks, sour cream, pumpkin pie spice, salt, and vanilla extract. Mix until well combined.
Add this mixture to the cheesecake filling and continue mixing on low speed just until well combined, scraping down the bowl as needed.
Transfer the filling into your foil-entombed springform pan where your now-room-temp gingersnap crust yearns to be united with this fluffy, pumpkin-y goodness. Place the pan into a water bath, and slide the whole thing onto the middle rack.
STEP 5: Bake that gorgeous thing!
Bake for 1 hour. Turn off heat, prop the oven door open slightly and let the cheesecake sit in the oven another 45 minutes or so.

So pretty!
Admire your handiwork. Ignore the hole in the top — that was from the thermometer. You’d read about the wobble test but it was hard to tell if it was rippling or wobbling, so you used the thermometer to verify it had reached an internal temperature of whatever Google said it should be (must I Google EVERYTHING for you?!).
Anyway, don’t worry about the hole — you’re gonna fill that in with caramel sauce later. (Or will you?)
Narrator: No, no you will not.
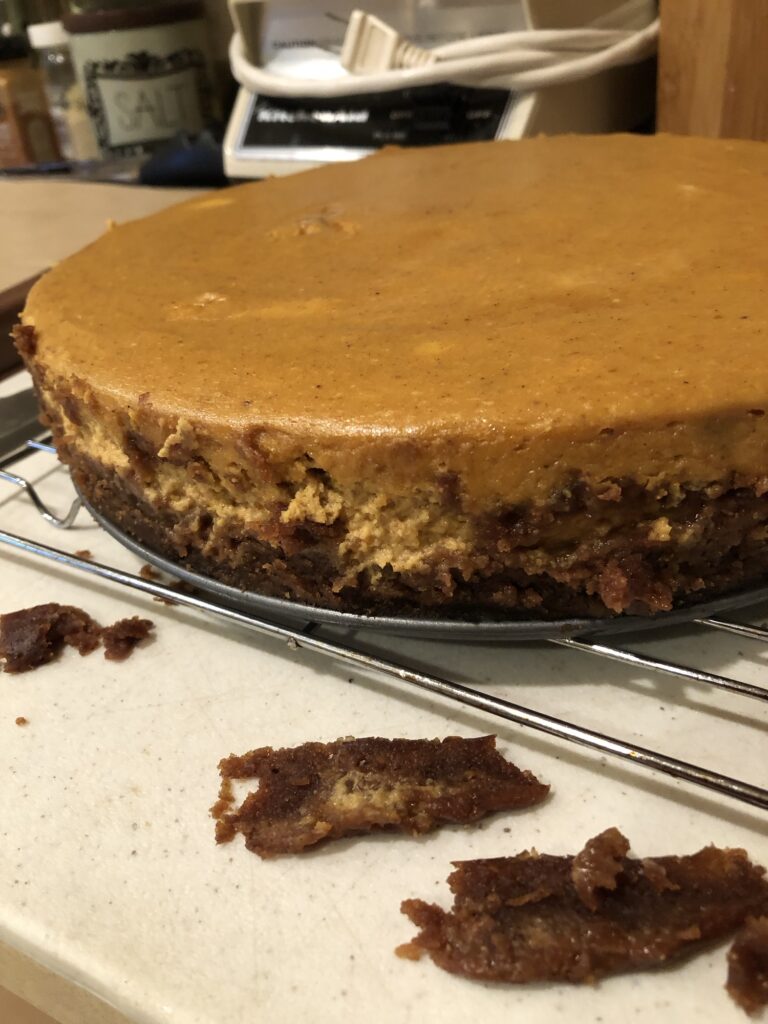
STEP 6: Remove pan from water bath & panic in the aftermath
Pull the springform pan from the water bath, place on a cooling rack on your countertop, and peel off the layers of foil from the pan.
Watch in horror as water spills forth from inside the foil. MOTHER.FUCKER! This is bad. This is really bad.
Consult the people of the internet: Can this thing be salvaged? Survey says: Maybe! Ignore the Pollyannas who suggest it might not be so bad, people won’t notice and if they do, it’s OK because it was made with love. No. Fuck those people — you took their advice on wrapping your springform pan, and you won’t be fooled again.
Tune into the advice from people who say no way, you can’t serve cheesecake with a wet crust, eww, that’s gross. They tell you you can try to dry out the crust with a little more time in the oven, or you can cut off the wet parts, bake a new crust, and pop the cheesecake into the new crust easy-peasy. Maybe this can work.
STEP 7: Attempt to dry out that crust
Turn the oven back on. Try 200°F — you don’t want to dry out the cheese, just the crust. Low and slow, amiright people?
Slide the dripping springform pan onto the middle rack. Slam the oven door. This better goddamn work.
STEP 8: Go for a walk
Meet your friend Jenny for a walk in the woods. That’s right — LEAVE THE HOUSE WITH THE OVEN ON!
If you don’t have a friend Jenny, you should really get one because she will talk you down from so many baking-related ledges. Like now. A walk in the woods is a great distraction from the soppy mess in your oven.
Tell Jenny your tale of woe. She’ll say, “Huh. I never use a water bath and my cheesecakes are always fine.” She’s not trying to suggest you are a fucking idiot, she’s just saying.
Make a mental note never to bake anything again without first running it by Jenny. She knows what the hell she’s doing.
As you walk, breathing in the crisp November air, imagine your house in flames. Second-guess your decision to leave the house with the oven on. Think about how embarrassing it will be if you return to the smoking ruins of your home because your neighbor Greg will surely be standing at the edge of your yard, arms folded across his chest, shaking his head, telling the fire marshal, “I gotta tell you, the way she sprinted from the house 20 minutes ago? She looked MAD. And you say she left the oven on? Interesting…“
Greg is a lovely man but he’s like a walking, talking Agatha Christie novel. Once he gets to talking, he can paint any one of us as a killer or an arsonist. You don’t want him speaking to the authorities, or worse yet, lecturing you on fire safety. The guy’s a bit of a know-it-all, TBH.
Cut your walk short, apologizing profusely to Jenny, who will understand because she is a sensible person who never leaves the house with the oven on. Not in a smug, neighbor-Greg kind of way, but because really, it’s not safe.
She’ll wish you well on your cheesecake-salvage mission, and you can’t blame her if she isn’t optimistic for the outcome. You don’t like your odds, either.
STEP 9: Hope against hope
Return home. It’s still standing, yay!
Turn off the oven. Take the springform pan out and place it back on the wire rack on your countertop. Let the cooling process begin! You’re gonna want to wait until this thing is room temp before you do anything more.
Except…waiting is really not your strong suit.
Spend a few minutes staring at the cheesecake and willing it to cool faster.
Stop waiting, start doing! Pop the lock on the springform and remove the sides. Then start cutting away the crust from the side of the cheesecake. Ugh. This is not gonna be pretty. But maybe it’ll work?
Eww.
After surgically removing as much crust as you can from the sides of the cheesecake, say a prayer as you flip the cheesecake over onto an inverted cookie sheet covered with a sheet of parchment so you can remove the bottom of the springform.
Oh.
No.
Oh. Noooooooooooo.
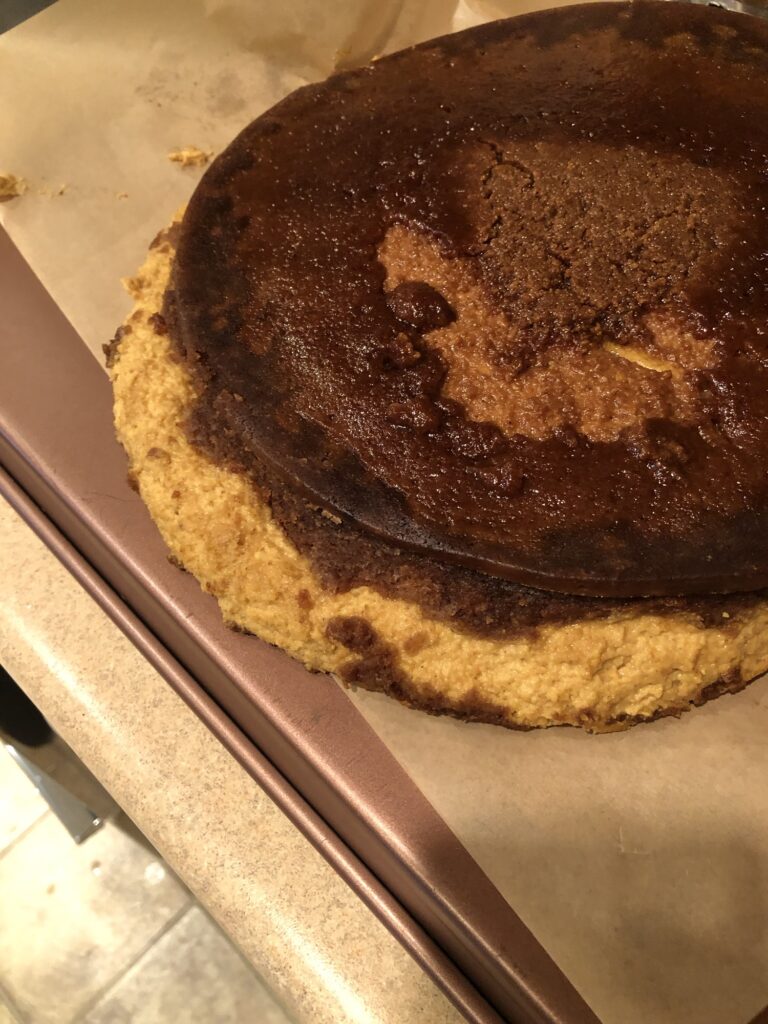
What have you done?!
Why didn’t you bring Jenny back home with you? She would have forcibly restrained you from flipping over that cheesecake prematurely. She would have said something logical like, “Dude, you should pop that in the fridge for an hour before trying any daredevil maneuvers.”
You are a disappointment on so many levels.
On the other hand, if everything went well, it wouldn’t be much of a story.
STEP 10: Rack your tiny, tiny brain for solutions
Oh wait, you still have that other box of ginger cookies! You can make sandwich cookies!
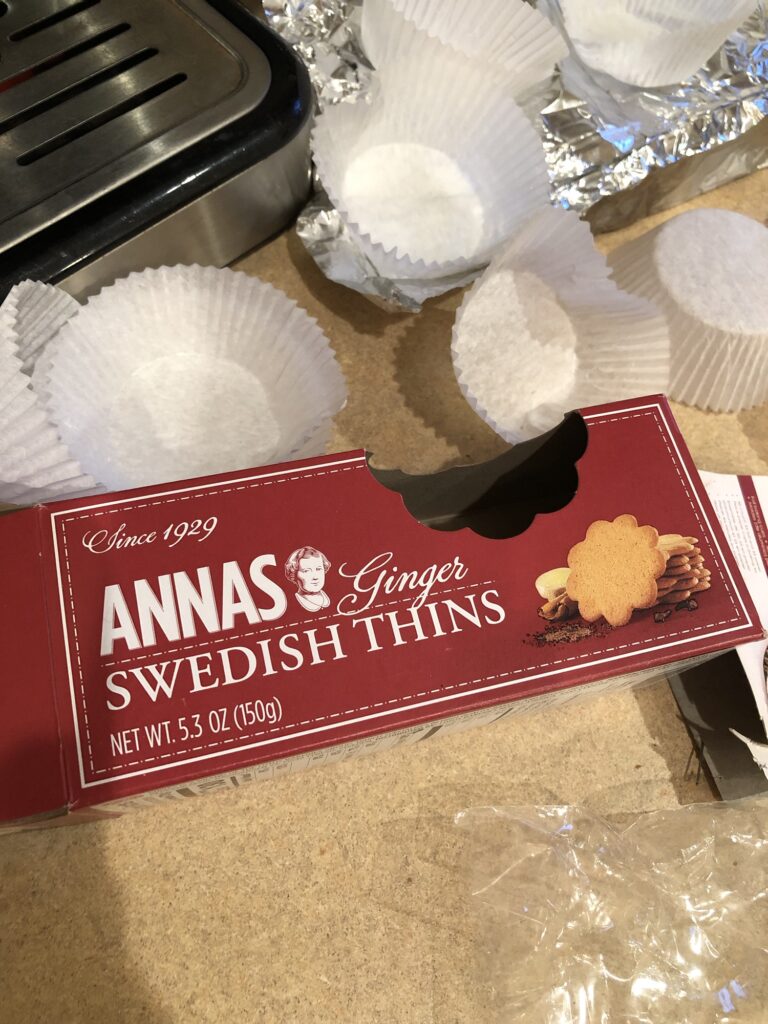
Thank god for Anna!
STEP 11: Assemble the sandwich cookies
Grab a couple muffin pans. Line them with foil or paper liners.
Put 1 ginger thin in the bottom of the liner. Sprinkle with a mixture of 3 parts sugar to 1 part pumpkin spice mix.
Scoop a spoonful of cheesecake on top of the cookie. Sprinkle with more of the sugar-spice mix. Top with another ginger cookie.
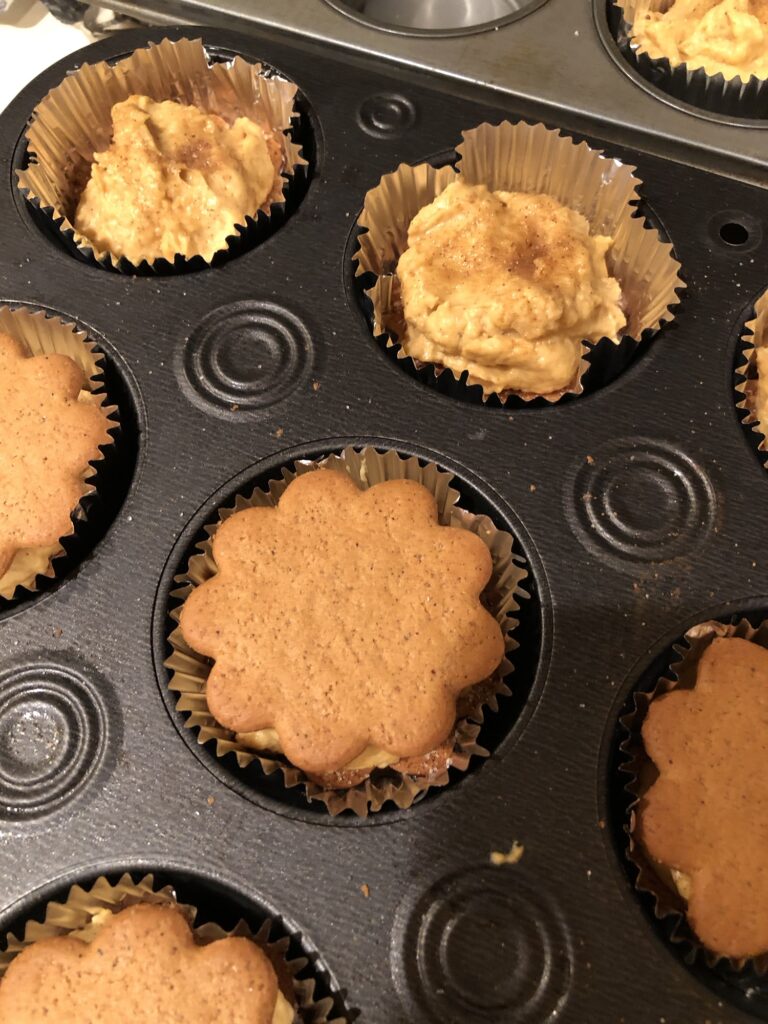
I mean…kinda cute, right?
STEP 12: Refrigerate
Put the sandwich cookies in an airtight container and pop in the fridge overnight. Like an idiot.
STEP 13: Plate the cookies for the party
Decide the cookies will look cuter on a tray without the baking cups, so take each one out and lay it on a festive tray. Like an idiot.
You’re now realizing that the thinness of the ginger thins is no match for the (forgive me…) moistness of the cheesecake. They are kinda soggy. You really should have waited to assemble these until you were onsite at your in-laws’ house.
Whatever, man, you’re in it now!
Plate them up, cover them with cling film, and get your ass in the car.
Step 14: Unveil your creation
After Fakesgiving dinner, retrieve your plate of cookies from the garage, where they’ve been chilling all afternoon. Peel back the cling film.
Huh. Is that…condensation inside the plastic wrap?
Yes, yes it is. And you know what that condensation has done? It has fused your cookies to the tray on a molecular level. Son of a bitch! Is there nothing about this dessert that will go well?
Find a paint scraper or rigid spatula. Start chiseling away, trying to free your stupid soggy sandwich cookies from the tray. When people ask what you’re doing, reply, “I’m so, so sorry. This is not how this was supposed to go.”
VERDICT: 8/10 for flavor, 1/10 for execution. There are so many lessons learned here. Even if you still fucked up the crust and needed to do sandwich cookies, they would have been way better if you’d used sturdier gingersnaps and assembled on-site. Let this recipe be a cautionary tale. Now you need to figure out what to do with that pint of heavy cream you don’t need since you didn’t make the caramel sauce & whipped cream. Maybe make the caramel sauce anyway? You can eat it straight from the spoon like a heathen, because, judging by the aesthetics of your Fakesgiving dessert offering, that is what you are. Bon appétit!